
A Guide to Effective Grasshopper Script Organization
As a project progresses, modelling requirements often evolve, making your Grasshopper script more cluttered and complex. To make handling and editing easier, it’s worth keeping your script as organized and tidy as possible from the beginning.
Investing just a small amount of upfront effort and time will pay off later, especially if you are adding more operations to an already complicated script. Not to mention, managing and working in an organized script is way more enjoyable.
This is a vital lesson I have learned over the years of using Grasshopper and I want to share some strategies that I use to keep my scripts tidy, easy to read and manageable.
Use the user interface (UI) options in Grasshopper
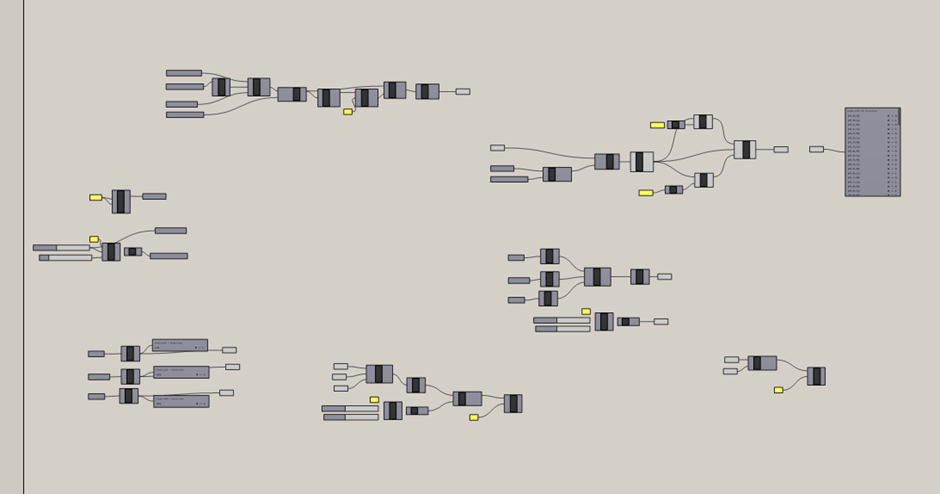
As you add components to your canvas, make use of Grasshopper’s several UI options to make your script tidier. A messy script is very difficult to read and understand, especially when there are many crossing wires.
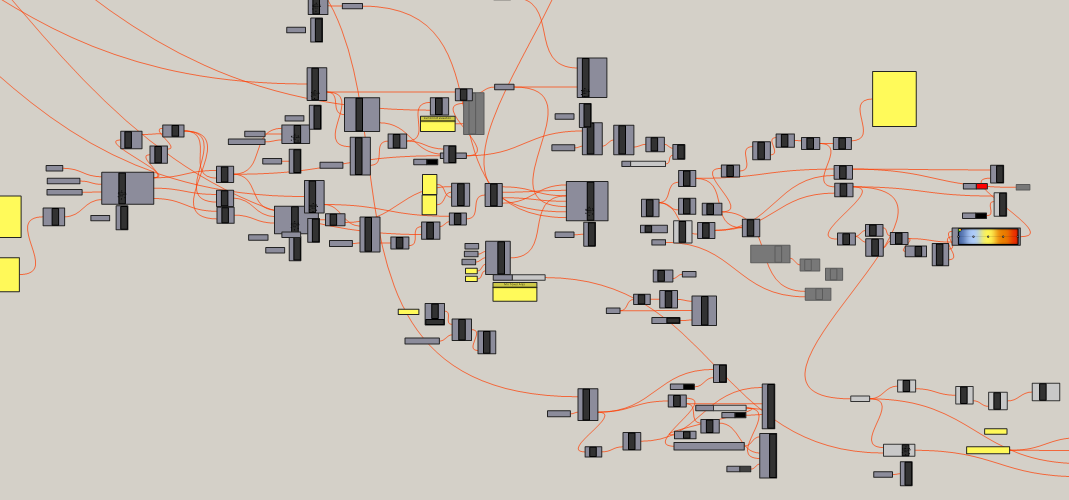
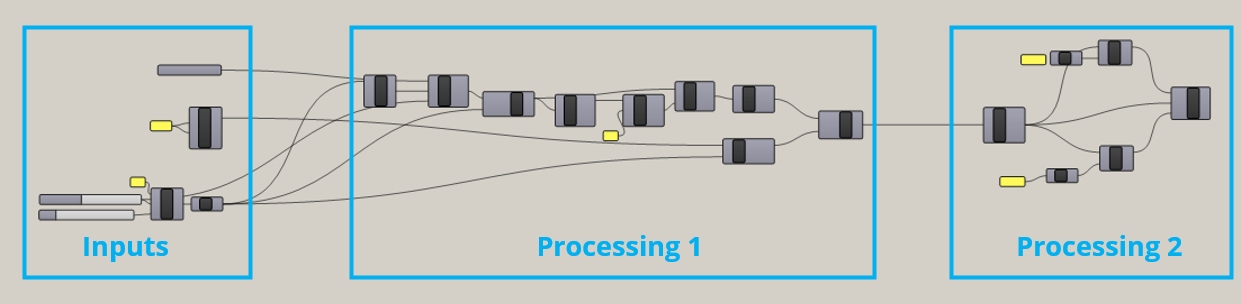
Example of a messy script
Using Containers and Wire styles
A good way to start tidying up is to make use of containers and the various wire styles that Grasshopper has to offer. This alone can make your script much easier to read and your future self (and anyone else who reads your script) will thank you.
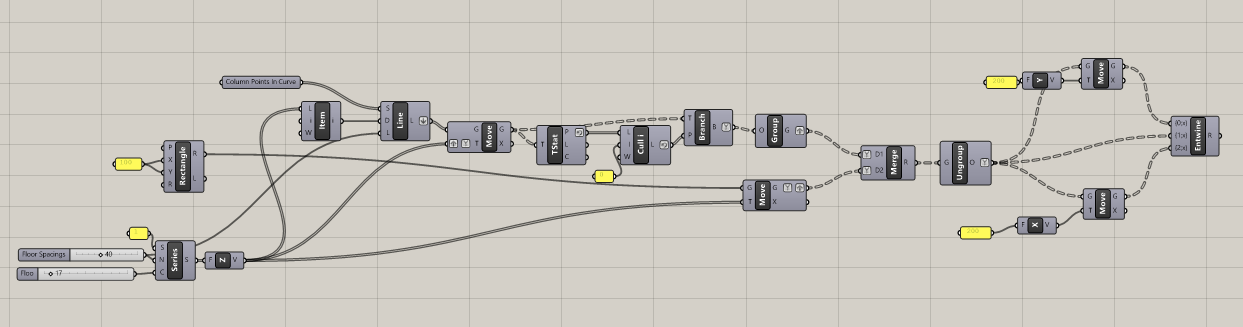
Let’s walk through an example of tidying up a script together. Consider the script below.
It’s a straightforward script, but it could quickly turn into a mess if more components are added. The key to organizing any script is to focus on one portion at a time, tidy it up, and then repeat the process for the rest of the script.
In this case, let’s focus on the top left of the canvas first.
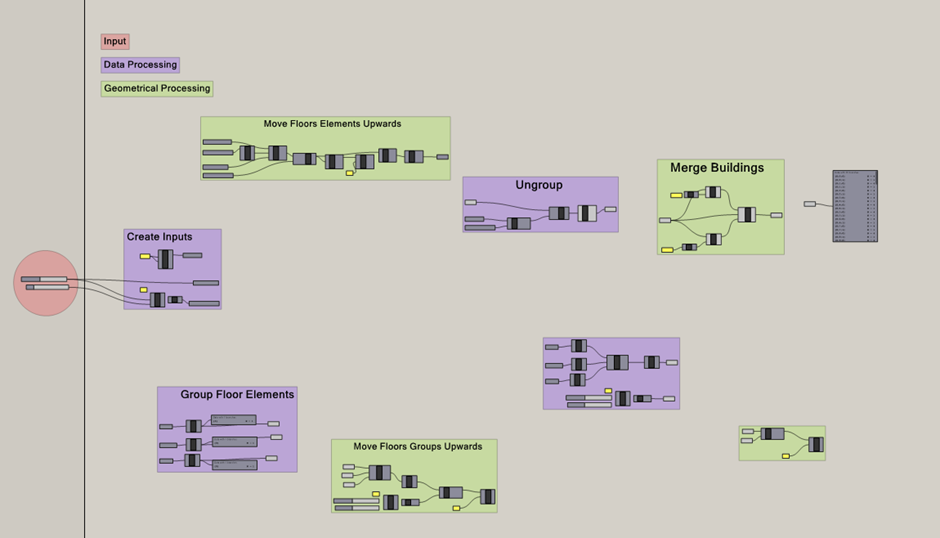
To start, we can separate the components into “areas”. These “areas” are like categories, they help you identify the responsibilities of a set of components in your script.
We are essentially looking for chunks of logic on the canvas that we can separate out. By separating out the “areas”, we are effectively “modularising“ the script.
Next, we'll focus on tidying up the wires connecting these “areas”. To do this, we'll replace each “output/input” with a container and use the "hidden" wire style (this does sound like a martial arts move).
Search for the appropriate container by either using the search bar or browsing the ribbon on the top. There should be a container for almost every data type you use in Grasshopper. For this example, I need a “rectangle” container, so I'll type “rectangle” in the search bar.
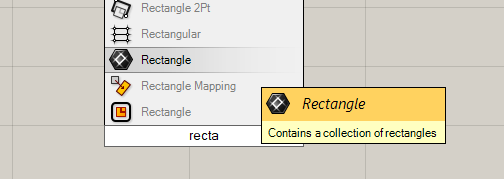
You can access the search bar by hitting the spacebar or double-clicking on a blank spot on the canvas
To make things easier to read and identify, I normally give the container a name. You can do this by using the right-click menu.
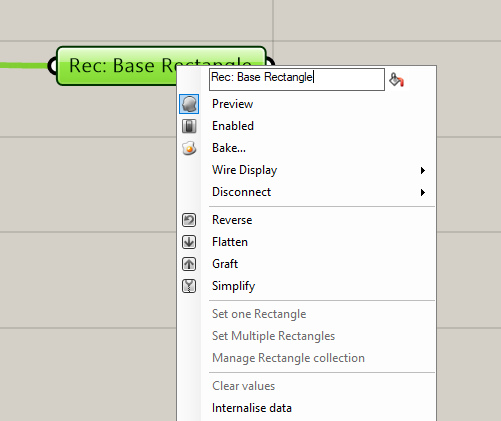
I prefer to leave the datatype visible and simply add a “: name“ after it, to ensure the datatype is always visible.
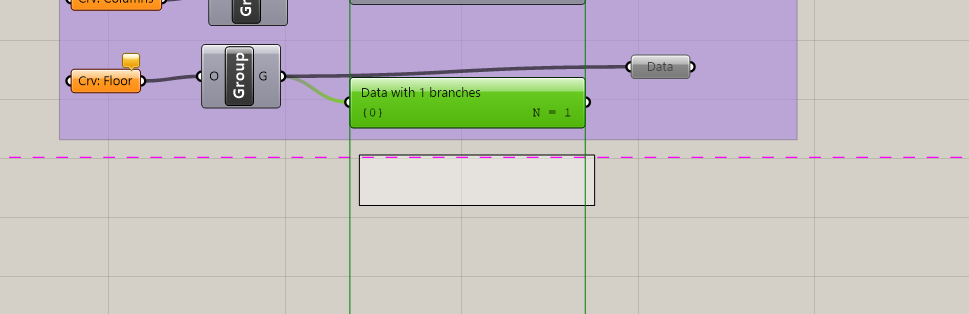
The idea here is to document what goes out and in each “area”. Using named containers is a good way to do this as it tells you both the data type and provides some context on the script.
But to use this container elsewhere in the script without the disturbance of the wires, we need to use the wire styles in Grasshopper. To do this, I duplicate the container and on the duplicated container, use the right-click menu to change the wire display to “hidden”.
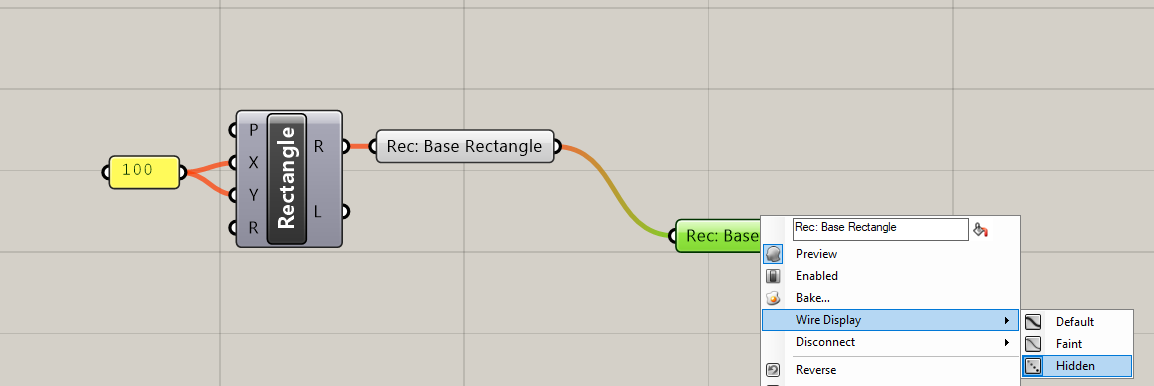
This lets you drag the container anywhere in the script without wire. If you select the container, you will be able to see the wire again.
Note: I know this seems like a lot of work but with the use of shortcuts, this process is very quick and the more you do it, the more efficient you become.
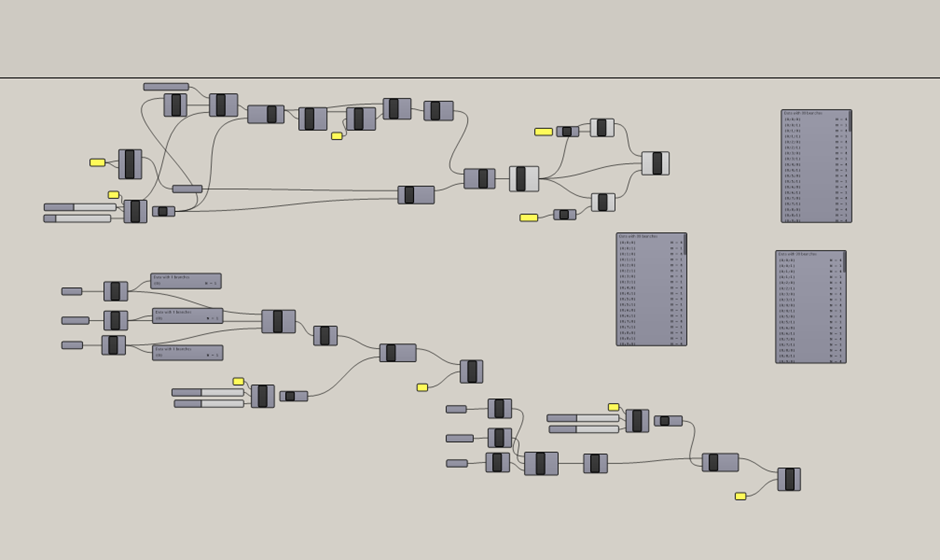
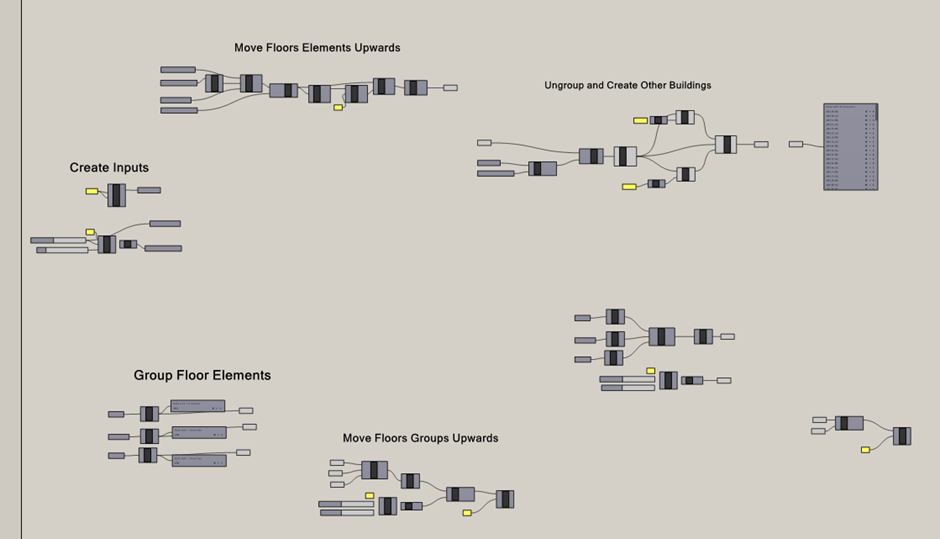
After applying this technique to all the "areas", you get a script that looks something like this.
By using containers and the 'hidden' wire style, we have clearly shown all the working parts of the script. We know what each “area” of the script is doing and what it’s responsible for. Additionally, this approach makes it easier to reuse component sets in the future.
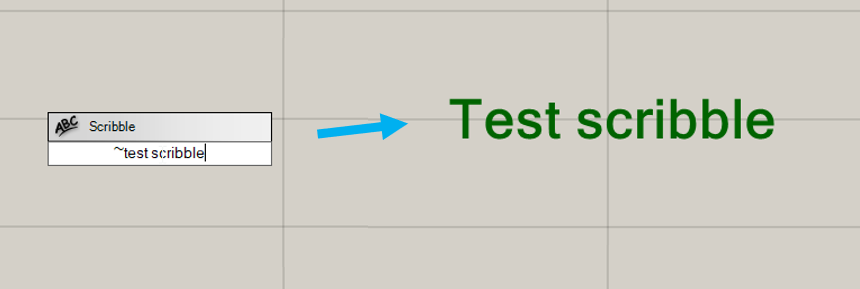
Applying labels using the Scribble component
We can make this even clearer by labelling each “area” of the script using the Scribble component. You can quickly create a scribble with a “~” followed by your label in the search bar.
Labelling each area provides a high-level view of the inner workings of the script and leaves breadcrumbs for anyone who needs to modify or read the script in the future. It turns Grasshopper scripting into a self-documenting process.
Here’s what the labelled version of the example looks like now.
Make each “area” standout with groups
If you are working with a large script that has multiple types of 'areas', colour-coding them might be beneficial. But colouring is the icing on the cake; using containers, wire styles, and labels will already significantly improve the understandability and manageability of your code.
Using groups is just another method to further enhance the organisation. Even though it might be excessive for our current script, let's do it anyway for illustrative purposes.
You can group components together by selecting them, and then selecting “group” in the right-click menu or you can use “CTRL+G“ on your keyboard.
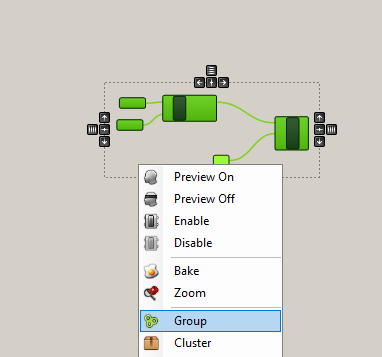
You can then change the colour of a group by right-clicking on the group and choosing your colour.
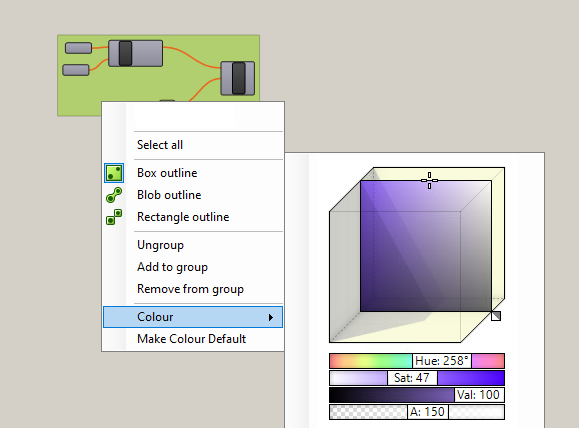
Here is what the coloured and grouped version of our example script looks like now.
Using colours and groups is just another way to make them stand out and to make the “areas” and workings of your group immediately apparent to anyone who is reading it.
I don’t often use coloured groups but it’s extremely useful for making certain areas stand out on the canvas.
Useful Plugins
Even if you're convinced about the value of organizing your script, it might seem like a cumbersome process. This is where plugins and tools can simplify the process and make it less of a chore.
There are many plugins out there that help you with this. You can find them on Food4Rhino but here are 2 of my favorite ones.
Snapping Gecko
SnappingGecko is a plugin that adds alignment guidelines to your Grasshopper canvas when you move components around, making it easier to neatly arrange your components. The plugin allows you to snap components to the lines for precise alignment.

Image Credit : SnappingGecko
Metahopper
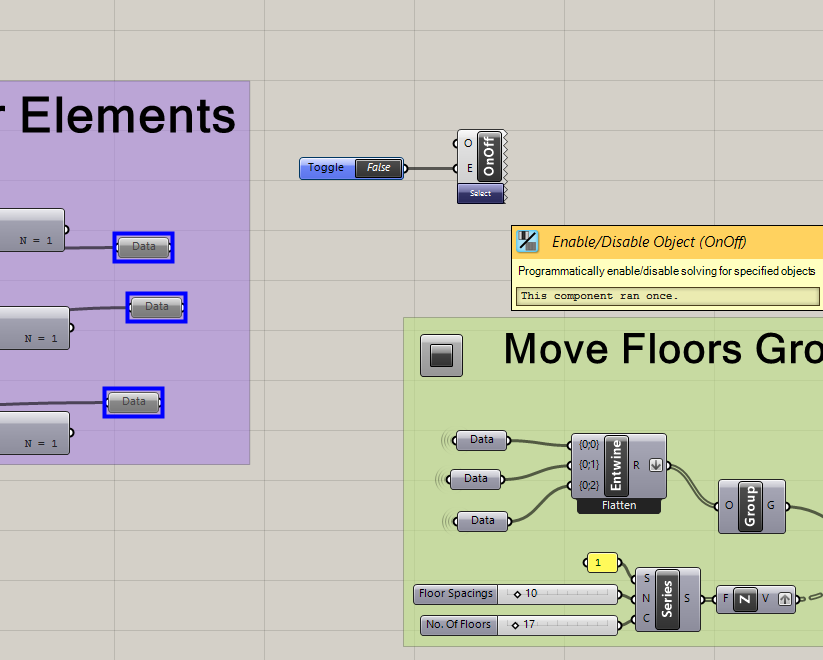
Metahopper is a plugin that offers a comprehensive collection of components for manipulating Grasshopper components. While I won't go into detail about its many functions, it is a useful tool for enhancing your Grasshopper workflows and making it easier to tidy up your script.
The two components I use the most are the Enable/Disable Object component and the Group Toggle component. They both give me greater control over how to enable and disable components on my canvas.
Keyboard and mouse shortcuts
The best way to get faster at organising your script is through the use of mouse and keyboard shortcuts, and the good news is, there aren’t that many of them.
Container and wire style shortcuts
For instance, let's look at how I tidied up the script with containers and the “hidden” wire style. Just to recap, here are the steps of the organisation process again.
- Create a container.
- Name the container.
- Duplicate the container.
- Change the wire style on the duplicated container to “hidden”.
We can speed up steps 3 and 4 with the use of shortcuts.
Duplication Shortcut (Holding Alt)
To quickly duplicate components in Grasshopper, hold “alt” and drag to create a duplicate of the component.
Wire Styles and Right-click menu
To quickly access items in the right-click menu, you can “right-click” and hit the starting alphabet of the action you want.
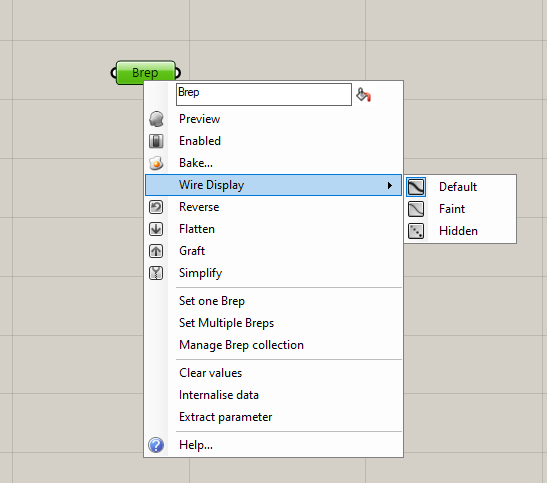
For example, to get to the “hidden” wire display. Just “right-click”, then hit “W” then hit “H” on the keyboard.
Final Thoughts
Organizing your Grasshopper script from the beginning can save you a lot of time and effort in the long run. By using containers, wire styles, labelling, and groups you can modularize your script and make it more readable and easier to manage. Additionally, you can use plugins and shortcuts to further speed up the organization and the scripting process.
The degree to which your script should be organised is quite subjective and varies from person to person, and project to project. It's also a recursive process; there is always room for more organisation, but the real skill lies in knowing the optimal level of organisation based on the size and complexity of your scripts.
While the process of organizing your script may seem cumbersome at first, the benefits of a tidy and well-organized script are well worth the effort. With that in mind, working with a tidy Grasshopper canvas makes the scripting experience more enjoyable and efficient.
Thanks for reading
Braden