
EleFront, the Data Exchange Plugin
Grasshopper comes as an extension to Rhino, a CAD software. There will inevitably be times when there is a need to transfer geometry and data between the two tools. While Grasshopper offers native ways to do this, the process can often be finicky and inconsistent. Especially if you need to exchange data on a regular basis.
Elefront, a Grasshopper plugin, addresses this issue by offering a range of components that standardize the way you read and write data to and from Rhino. It proves to be a crucial plugin for the "Distributed Data Model" and for anyone seeking consistency in their Rhino/Grasshopper data management.
Before we explore Elefront, let's take a moment to understand the native functionality for exchanging data between Rhino and Grasshopper. This helps us understand the value that Elefront brings over the native functions.
Reading Rhino Geometry in Grasshopper
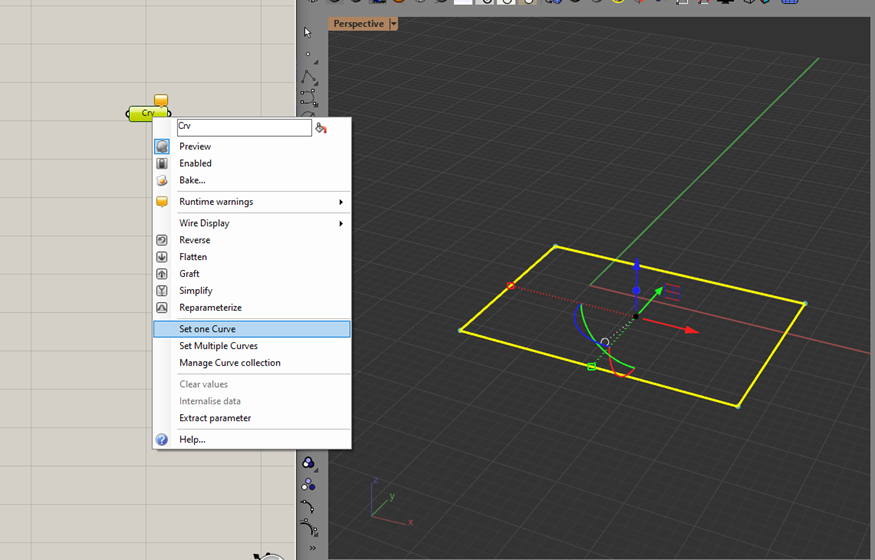
To import Rhino data into Grasshopper, you need to use a “Container” and reference the data you want using the right-click menu.
While there is nothing wrong with this method, it has a lot of limitations when it comes to bigger models. Because referencing is done manually, any changes to the Rhino model are not captured in Grasshopper and have to be manually re-referenced again. As you will see later, Elefront tries to solve this by giving you predictable ways to reference Rhino geometry.
Writing (Baking) geometry into Rhino
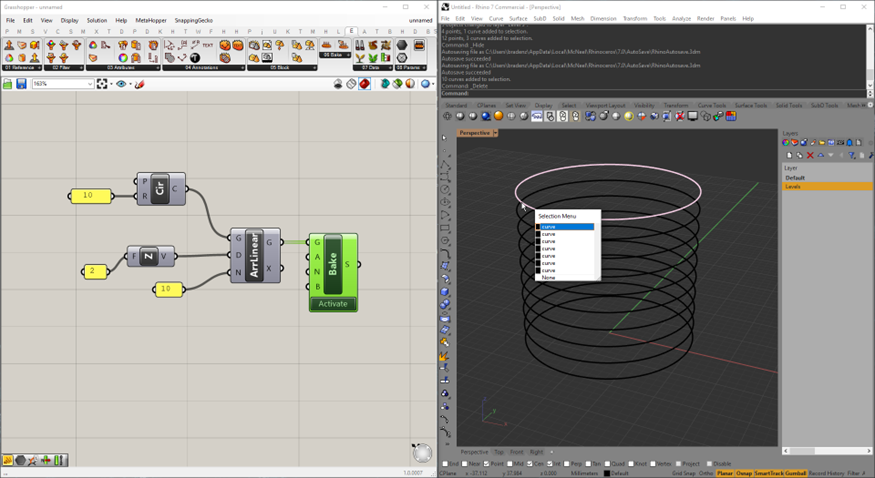
To write geometry back into Rhino, a process referred to as "baking," you can use the same right-click menu. This time you don’t need a container, you can just right-click on the objects and select the “Bake” option.
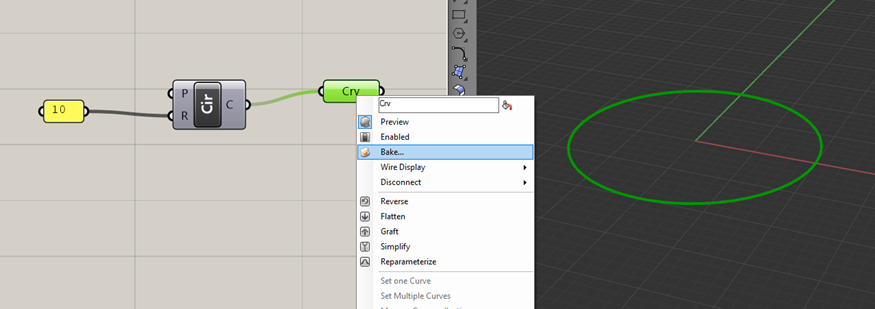
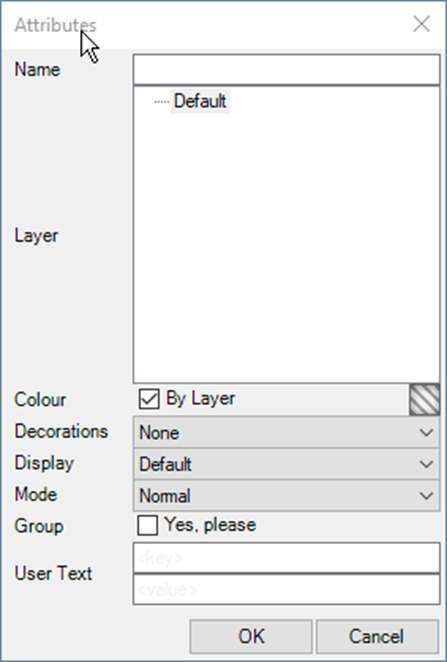
You then get a prompt to choose a layer to bake your geometry in Rhino.
The native baking works well for simple cases but it has a few caveats. Firstly, you must create the corresponding layer in Rhino before you can bake objects into it. Secondly, if you are baking a list of elements, you cannot assign metadata to each geometry element during the baking process.
Both native reading and writing methods work well but they all require more manual processing than needed. It also makes exchanging any metadata or properties more difficult. Let’s take a look at how Elefront changes this process.
Reading geometry with Elefront
Elefront addresses the inconvenience of manually re-referencing data by offering a range of flexible patterns for referencing Rhino geometry. These patterns provide consistent and predictable ways to establish and maintain the connection between Rhino and Grasshopper.
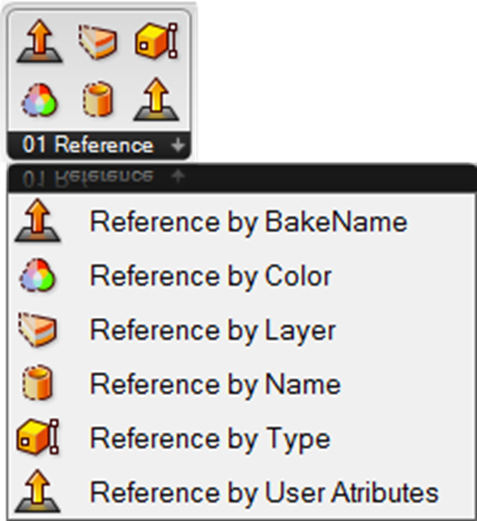
One of my most frequently used components is the "Reference by Layer" component. This leverages the Rhino layer system to pull in any geometry that resides on a specified Rhino layer.
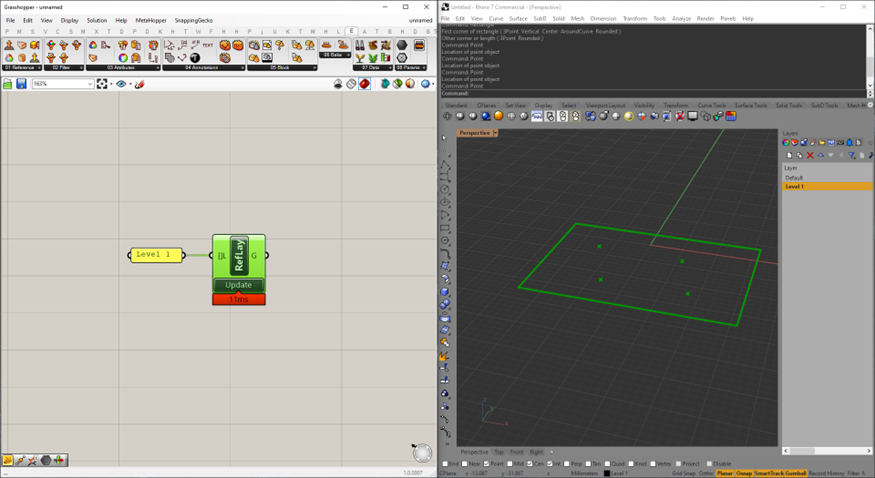
By leveraging Rhino layers, you are encouraged to maintain a more structured and consistent organization of layers in your Rhino file. The advantage of this component is that any changes made to the Rhino file within the same layer can be automatically brought into Grasshopper without manually re-referencing the individual objects.
It also opens up the possibility of using different Rhino files for the same Grasshopper file, as long as the layer structure and geometry are similar. This is handy for situations where the geometry is changing but the logic in Grasshopper is not.
Fuzzy Reading
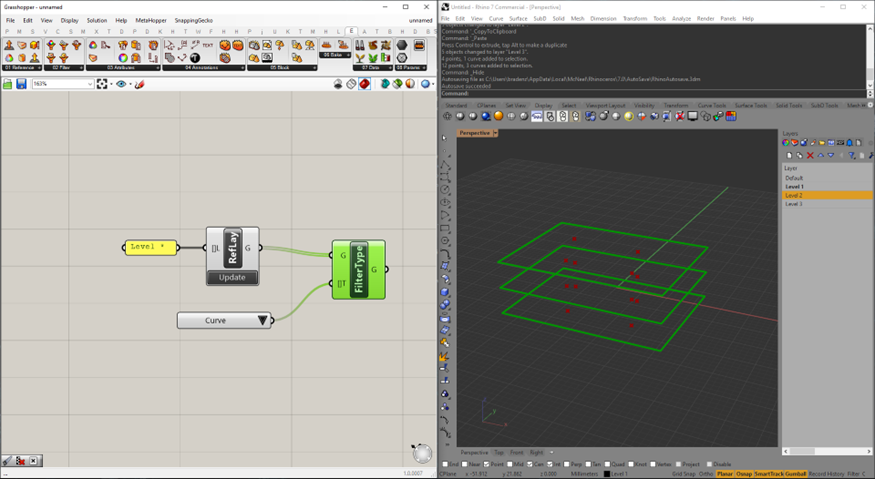
To make referencing even easier, Elefront offers a fuzzy search feature. This means as long as your name follows a pattern, you can use wildcards to reference your geometry.
For example, if I had layers with the names “Level 1”, “Level 2” and “Level 3”. I can pull all the geometry by inputting “Level *“ into the “Reference by Layer” component.

Type Filtering
Once you have referenced your Rhino geometry into Grasshopper, you can further filter the objects based on their properties. While there are a few properties for you to choose from, I used the “Filter by Type” component the most to ensure that I am working with the right type of geometry.
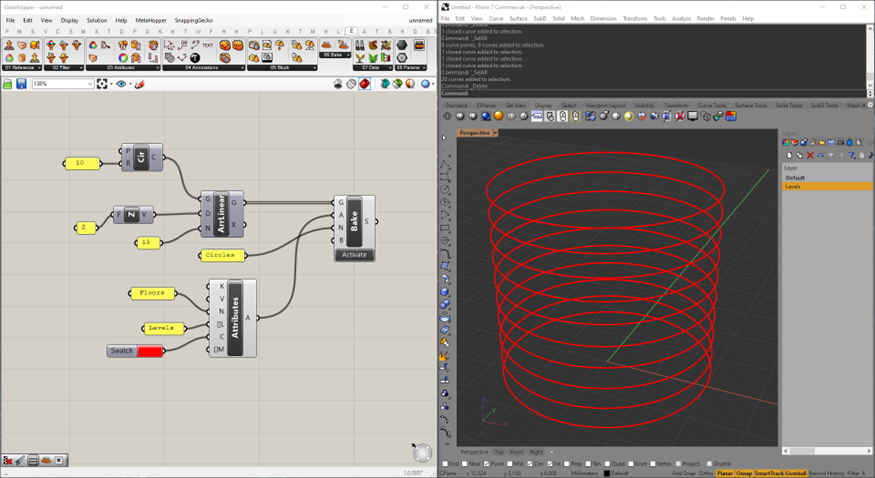
Baking geometry with Elefront
By using the “bake” component in Elefront, all you have to do is plug in the geometry you want to bake and hit “Activate”. This is a lot more straight forward than the manual way of using the right-click menu.
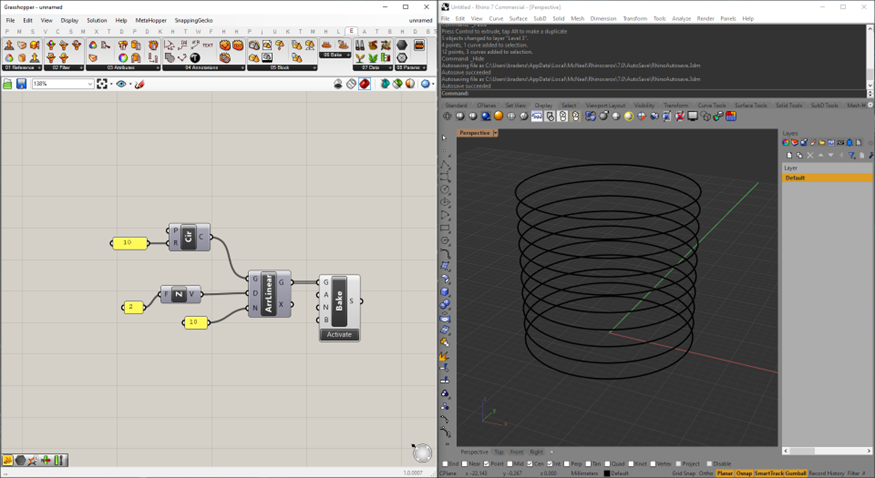
But you might notice that if clicked on “Activate” multiple times, you'll end up with duplicates of your geometry.
This is because, without any other inputs, the “bake” component behaves like the native bake method, it just adds the geometry to the active Rhino layer. But you can get Elefront to delete any existing geometry and then bake in the new ones by making use of a “BakeName”.
A “BakeName” is a label that you can give to the set of geometry that you want to bake. Elefront will use the “BakeName” to determine what geometry to delete and replace.
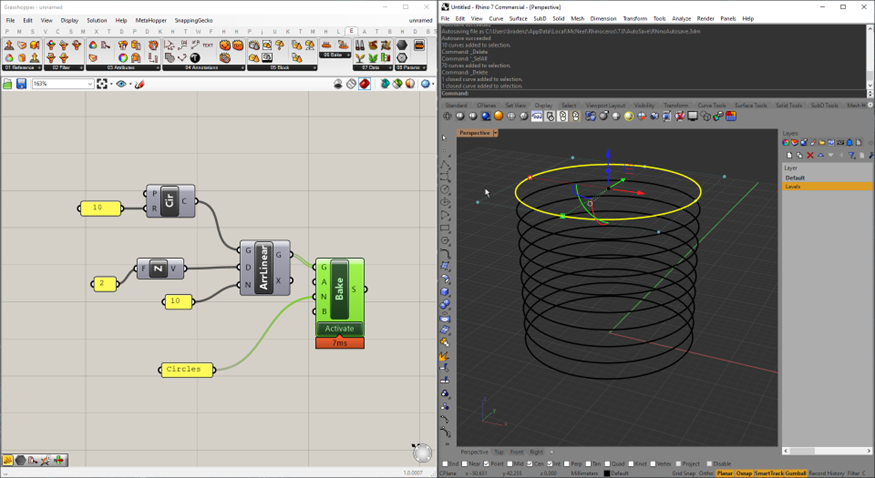
The list of circles is now baked into Rhino with the “circles” BakeName
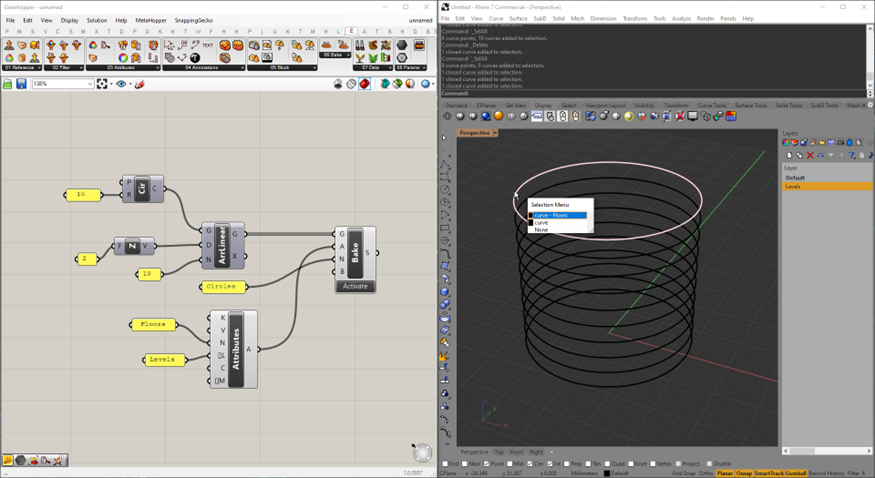
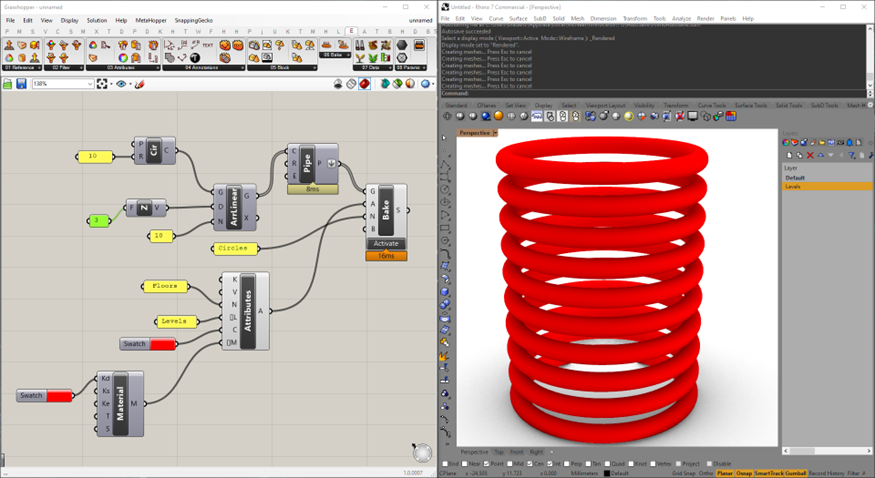
By default, the "Bake" component will place your geometry into the currently active layer in Rhino. However, you can gain more control over the baking process by defining using the “Object Attributes“ component before performing the bake operation.
For example, you can define the layer name as an input to the “Object Attribute“ component.
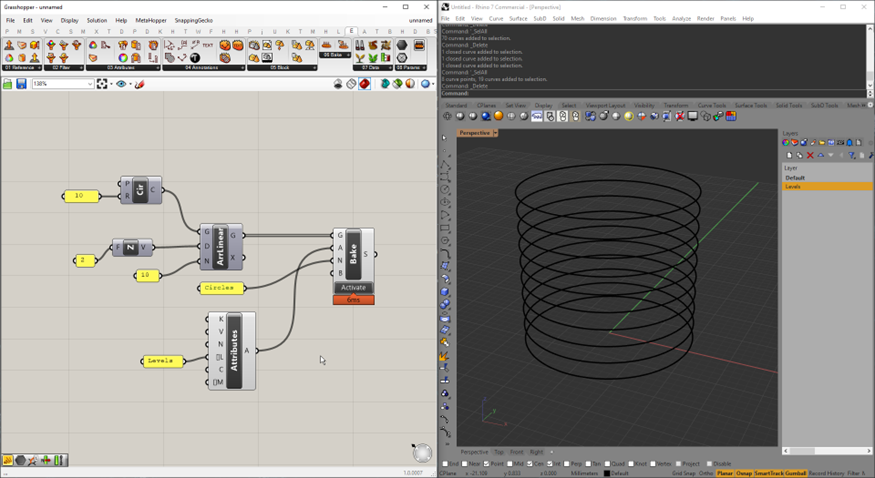
More than just the layer name, the “Object Attributes“ component lets you attach additional data and attributes to your geometry, such as materials, user data, and more.
Let’s quickly walk through each input.
Name
The 'N' input allows you to attach a name to the set of objects that you are baking. Although it may seem confusing, this feature differs from the 'BakeName' earlier. The 'Name' attribute serves as an additional label for your geometry. This becomes particularly useful when dealing with overlapping geometry, as the assigned name helps you differentiate and select the right objects.
Colour & Material
The “C” and “[]M” input stands for “Colour” and “Material” respectively. They let you control the appearance of your geometry when you bake into Rhino. For example, we can turn the circles red by plugging in a red swatch.
We can do the same for the material input, but the effect of materials only applies to the “Rendered” view.
But perhaps the most useful input of the “Object Attributes” component is the 'K' and 'V' inputs, as they allow you to attach metadata to your geometry. They provide a powerful way to associate any relevant information with your geometry.
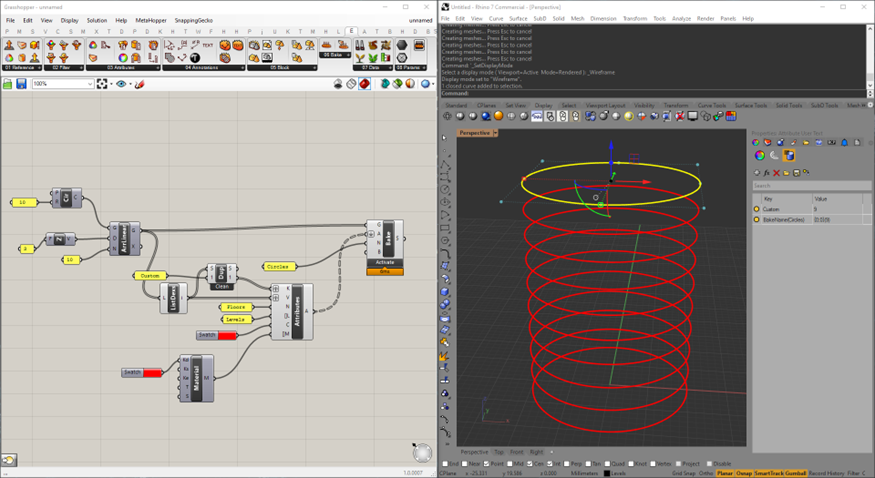
For instance, if you were an engineer, you could attach analysis results directly to your model.
But a more practical application for metadata is attaching data-tree paths and indices to your geometry. This allows you to preserve your current data structure as you bake them into Rhino. This is important if you are using Rhino to transfer data between Grasshopper scripts.
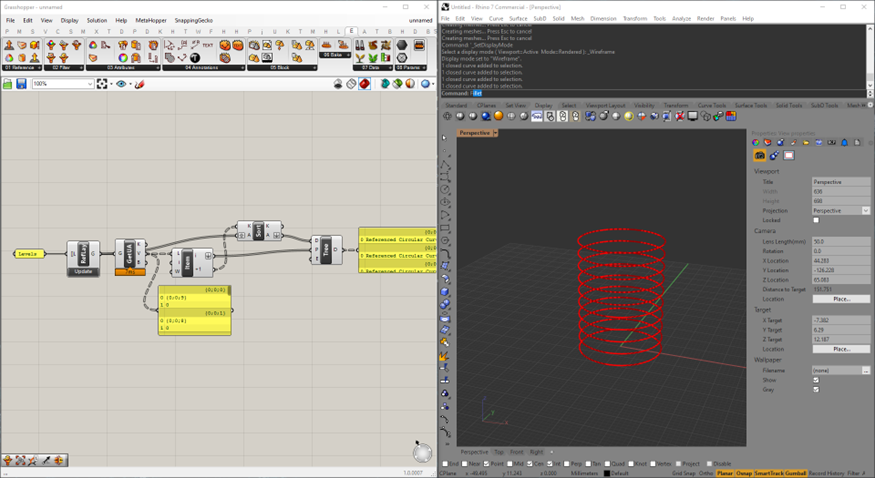
Then, when you read the geometry back, all you have to do is read the data-tree paths and indices to reconstruct the data tree, like so.
Final Thoughts
Elefront offers a dynamic and efficient solution for data transfer between Rhino and Grasshopper, making the traditional process more systematic and programmable. It not only standardizes data management but also introduces a whole array of control like filtering and custom baking options.
And because of that, Elefront makes the distributed data model approach possible which I think is essential for dealing with large and complex projects.
Thanks for reading
Braden